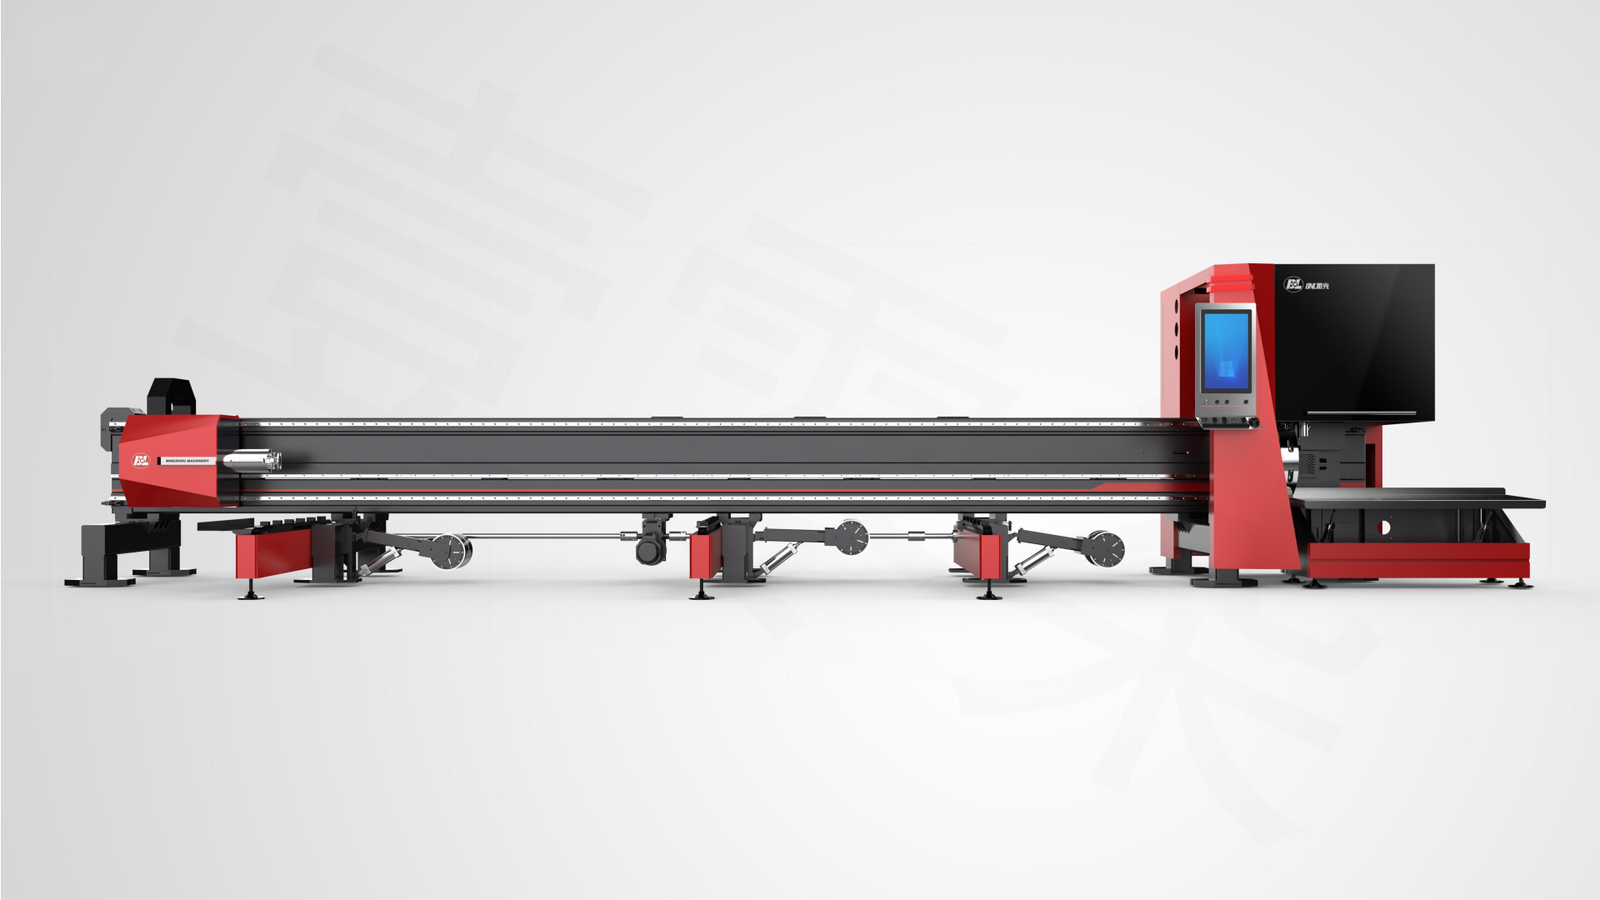
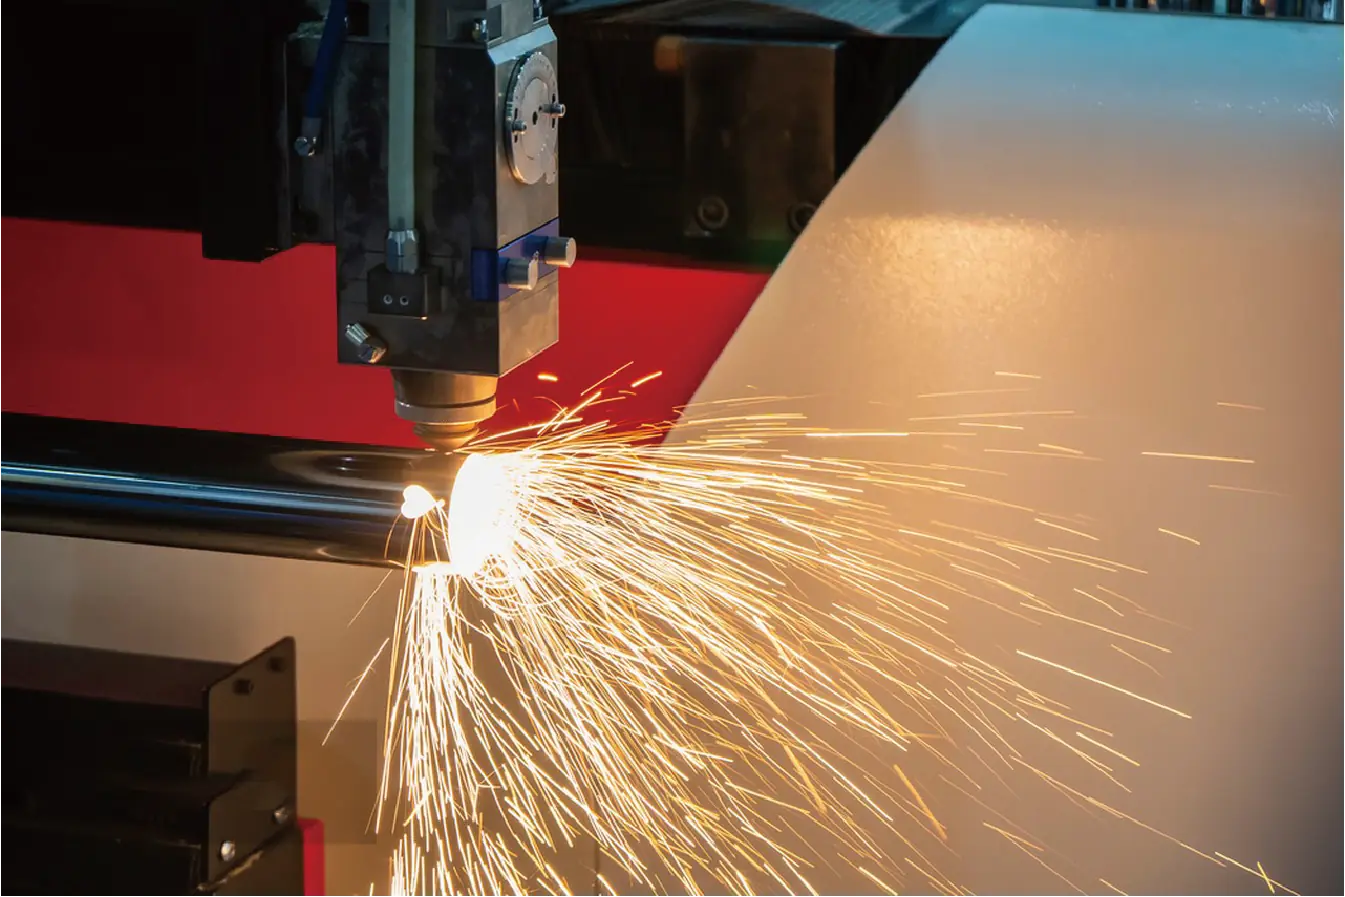
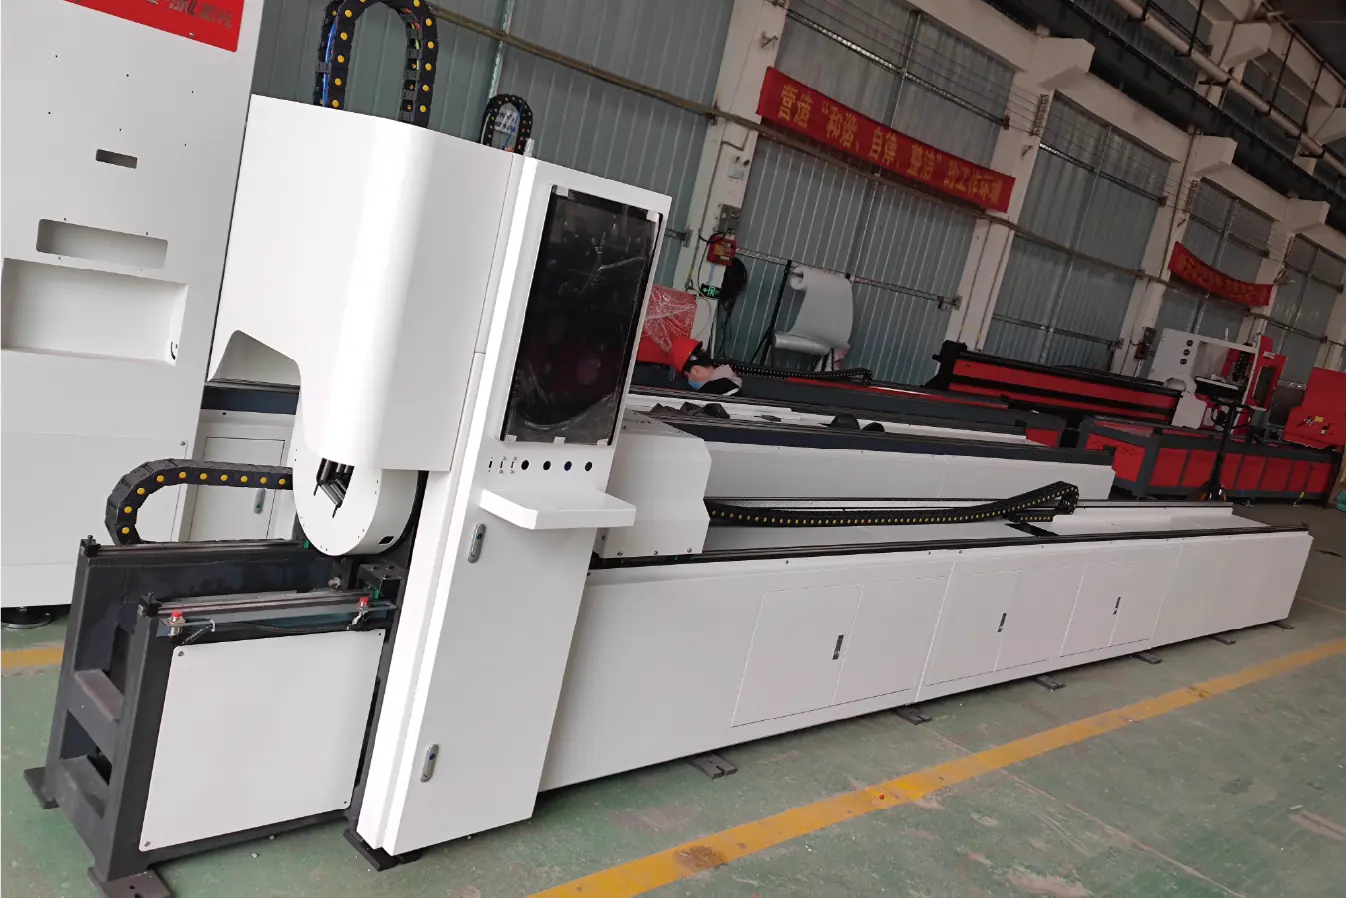
Beveling Tube Laser Cutting Machine SF6020GT
Struggling with complex tube cuts and material waste? Inefficient processes are costing you time and money, directly impacting your bottom line and your ability to compete in a demanding market.
Mastering the SF6020GT is a straightforward process covering five key areas: proper setup, initial calibration, optimal parameter input, routine maintenance, and effective troubleshooting. This ensures maximum efficiency, minimizes material waste, and delivers a rapid return on your investment.
As the General Manager of MZBNL, I've spoken with hundreds of plant managers. I know that investing in new technology is only the first step. The real value comes from making that technology work for you, seamlessly and efficiently. The SF6020GT was designed to address the industry's most pressing needs for precision and automation. Let's walk through exactly how you can unlock its full potential in your facility.
How to Set Up the Beveling Tube Laser Cutting Machine SF6020GT?
A new machine arrives, full of promise, but the setup can seem daunting. An improper setup leads to immediate errors, downtime, and frustration. We've engineered our process to be simple and direct.
Setting up the SF6020GT involves three core stages: ensuring a stable foundation with correct power, connecting all pneumatic and auxiliary gas lines, and installing our intuitive control software. This systematic approach guarantees a safe and efficient startup.

To dive deeper, the setup process is the foundation for everything that follows. We designed the SF6020GT not just for performance, but for accessibility. Modern manufacturing demands agility, and that starts with getting new equipment online quickly. When I speak with clients, I emphasize that our goal is to reduce training time from weeks to a single day, and that begins here.
Site Preparation
First, the machine needs a solid, level concrete floor to absorb vibrations and ensure stability. This is non-negotiable for high-precision cutting. You also need to ensure the electrical supply meets the machine's specifications, including proper grounding. A stable power source prevents issues with the laser generator[^1] and control systems.
Mechanical and Pneumatic Connections
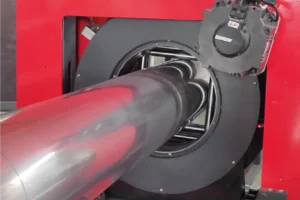
Our technicians will guide your team through connecting the main machine body, the automated front-end feeding mechanism, and the unloading system. This automated system is a core feature for reducing labor costs. We then connect the compressed air and auxiliary gases[^2] like oxygen or nitrogen. Clear labeling and simple connections mean your team can understand the system's logic quickly.
Software and Final Checks
Finally, we install the control software on the main console. We've invested heavily in a user-friendly interface because complex technology should be simple to operate. Once installed, we run a series of system checks to ensure all components are communicating correctly. This entire process is designed to be completed efficiently, getting you into production faster.
What are the Initial Calibration Steps for the SF6020GT?
Your machine is set up, but is it ready for precision work? Skipping calibration is like trying to build a house with an crooked level—it results in inaccurate cuts and wasted material.
Initial calibration focuses on aligning the laser path, focusing the laser head, and verifying the chuck's centering and coaxiality. These steps are critical for achieving the high-precision bevel cuts that define the SF6020GT's value.
To dive deeper, calibration is where the machine's potential for precision is truly unlocked. In an industry where a fraction of a millimeter can make the difference between a perfect part and a scrapped one, this step is paramount. I recall visiting a client in the automotive parts sector who was experiencing slight inconsistencies in their welds. We traced the problem back to a minor calibration drift in their old machine. After we calibrated their new SF6020GT, the issue vanished, saving them thousands in rework and material costs. This is why we are so meticulous about these initial steps.
The process involves a few key checks:
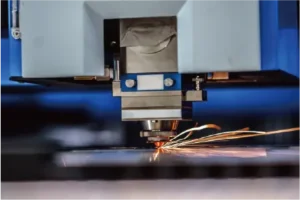
- Laser Path Alignment: We ensure the laser beam travels perfectly from the generator, through the mirrors, and down to the cutting head. A perfectly centered beam is essential for consistent power delivery across the entire cutting area.
- Focal Length Adjustment: The focus of the laser determines the пропил[^3] (the width of the cut) and the quality of the edge. We calibrate this based on the materials you will be cutting most frequently. Our system can also automatically adjust this for different jobs.
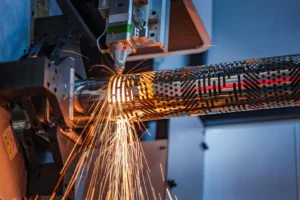
- Chuck Coaxiality: The front and rear chucks must be perfectly aligned on the same axis. This guarantees that as the tube rotates, the laser's cutting point remains perfectly consistent, which is crucial for complex cuts and bevels.
- Bevel Head Verification: We test the 45-degree beveling head to confirm its angle accuracy. This ensures that when you need to cut tubes for welding or complex joints, the angles are precise every time, improving fit-up and reducing downstream labor.
How to Input Cutting Parameters for Optimal Results?
You have a powerful, calibrated machine, but how do you control it? Using the wrong parameters can lead to poor edge quality, slow cutting speeds, or even damaged parts, negating the machine's efficiency.
For optimal results, first select the material type and thickness from our software's pre-loaded library. Then, fine-tune the power, cutting speed, and gas pressure based on your specific job requirements. Our system provides intelligent recommendations to start.
To dive deeper, think of cutting parameters as the recipe for a perfect cut. Our goal at MZBNL is to give you a comprehensive cookbook, not just a raw oven. The SF6020GT's control system comes with a built-in library of parameters for common materials like carbon steel, stainless steel, and aluminum. This is our answer to the industry's need for flexibility and reduced setup time. An operator doesn't need to be a laser physicist; they can select a starting point and make minor adjustments.
Here are the core parameters you'll work with:
| Параметр | Функция | Impact on Quality |
|---|---|---|
| Мощность лазера (Вт) | The energy used to melt the material. | Higher power for thicker materials. Too high can cause burning; too low results in an incomplete cut. |
| Cutting Speed (m/min) | How fast the laser head moves along the cut path. | Too fast can leave an incomplete cut. Too slow can cause excessive melting and dross (slag). |
| Gas Pressure (Bar) | The force of the auxiliary gas (O2 or N2). | This blows the molten material out of the cut. The right pressure is key for a clean, smooth edge. |
| Focus Position | The laser beam's focal point relative to the material surface. | Crucial for edge quality. A different focus is needed for cutting versus marking or for different material thicknesses. |
Getting these settings right is what allows you to minimize material tail waste and achieve the high levels of precision that modern manufacturing demands. This is how the SF6020GT directly contributes to a more profitable and sustainable operation.
What are the Maintenance Steps to Ensure Longevity of SF6020GT?
You've made a significant investment in a key asset for your production line. But neglecting maintenance leads to unexpected breakdowns, production halts, and costly repairs, eroding your ROI.
Key maintenance includes daily cleaning of the protective lens and nozzles, weekly checks of the water chiller and lubrication systems, and monthly inspections of guide rails and belts. This proactive schedule ensures consistent performance and extends the machine's life.
To dive deeper, I see our machines as long-term partners in our clients' success. And like any partnership, it requires consistent attention. A simple maintenance routine is the single most effective way to protect your investment and ensure the SF6020GT continues to be a competitive benchmark for your company. We've designed the machine with easy access to key maintenance points to make this process as painless as possible. Think of it not as a cost, but as an investment in uptime and reliability.
Here is a simple schedule we recommend to all our clients:
Daily Tasks (5-10 minutes)
- Check Protective Lens: A clean lens is critical for cutting quality. Wipe it with the recommended solution and cloth.
- Inspect Nozzle: Check the nozzle for damage or debris. A blocked or misshapen nozzle will ruin your cuts.
- Empty Slag Tray: Clear out the debris from underneath the cutting area to prevent buildup.
Weekly Tasks (20-30 minutes)
- Check Water Chiller: Ensure the water level is sufficient and the temperature is stable. The chiller is vital for keeping the laser source cool.
- Inspect Lubrication System: Check the oil levels for the automatic lubrication system that services the guide rails and racks.
- Clean Dust Filters: Clean the filters on the machine's electrical cabinet and exhaust fan to ensure proper airflow and cooling.
Monthly Tasks (1 hour)
- Inspect Guide Rails and Racks: Clean them thoroughly and check for any signs of wear.
- Check Belt Tension: Ensure the drive belts have the correct tension for accurate motion.
How to Troubleshoot Common Issues with SF6020GT?
Even the most reliable machines can encounter issues. When production stops, downtime is expensive, and waiting for a technician to arrive can be frustrating. Many common problems have simple, immediate fixes.
To troubleshoot, first check for software error codes, which often pinpoint the issue. For poor cutting quality, inspect the nozzle and protective lens. If the machine stops unexpectedly, verify the auxiliary gas supply is on and check for physical obstructions.
To dive deeper, we empower our clients to be the first line of defense. Our philosophy is that a well-informed operator can solve 80% of common issues without a service call. This is part of making advanced technology accessible. The control software is designed to provide clear, actionable error messages. Instead of a cryptic code, it will often suggest a direct cause.
Here are a few common scenarios and the first things to check:
Why are my cuts incomplete or jagged?
This is almost always related to one of three things. First, check your cutting parameters—is your speed too high or your power too low for the material? Second, inspect your consumables. A dirty protective lens or a worn-out nozzle is a very common cause. Third, check your focus position. An incorrect focus will result in a weak or dispersed beam.
Why is there dross or slag on the bottom edge of the cut?
This points to an issue with material evacuation. The most likely culprit is incorrect gas pressure. It might be too low to effectively blow the molten metal away. Alternatively, your cutting speed could be too slow, causing the material to melt excessively instead of being cleanly sheared away.
The machine stopped with an alarm. What should I do?
First, don't panic. Note the alarm code displayed on the screen. Our manual has a comprehensive list of these codes and their solutions. Common alarms relate to low gas pressure, chiller temperature issues, or a safety door being open. If the solution isn't immediately obvious from the manual, that's when you call our 24/7 support line with the specific code, and we can walk you through the fix.
Заключение
Mastering the SF6020GT comes down to a systematic process. By following these steps for setup, calibration, operation, and maintenance, you unlock its full potential for high-precision, efficient production. This is how you reduce waste, lower labor costs, and secure a real competitive edge.
У вас есть вопросы или нужна дополнительная информация?
Свяжитесь с нами, чтобы получить индивидуальную помощь и квалифицированный совет.